Rancherってなに?
Kubernetes(K8s)を使いやすくするための、OSSのソフトウエアです!
簡単には以下のことができます。
- 異なる環境のK8sクラスタの一元管理
- K8sクラスタへのアプリの導入
- Istio(サービスメッシュ)との連携
うーん、便利そうですけどどうなんでしょう?
という事で、実際に作ってみて触ってみましょう!
Rancherを構築する
Rancherの構築には大きく分けて2種類あります。
- 単一ノードのRancherをDockerコンテナとして構築する。
- 高可用性のRancherをKubernetes内に構築する。
Dockerコンテナの方はたくさん記事があり、またIstioなどの機能を試してみたいので、高可用性Rancherの構築を行います!
Rancherの構成
以下の構成でRancherを構築してみようと思います。
- 基盤: Windows10上のVirtualBox
- 構成台数:Racher 3台 LB&DNS 1台
- CPU:3,2,2,1
- メモリ:4GB x 3, 1GB x 1
- OS:Ubuntu 18.04
- Nic:2つずつ(NAT, Internal)
- ロードバランサ(LB),DNS: LBとDNS用のUbuntuを1台構築します。(cpu=1, memoty =1GB)
VirtualBoxのNATNICで外との通信を行い、InternalNICでクラスタ間の通信を行います。
PCには最低cpu8コア, メモリ16GBくらい必要です。
作業
1. 仮想マシンのブートストラップ
こういった検証をしていると仮想マシンの作成と、OSのインストールにかかる時間がとても大きいため、できる限り短縮して行うためにVagrantを使います。
WindowsにVirtualBoxとVagrantをインストールしたら、任意のフォルダに以下のvagrantfileを作成します。
vm_spec = [
# rancherノード #1
  { name: "rancher-0", cpu: 3, memory: 4096,
    box: "ubuntu/bionic64",
    private_ip: "172.16.20.210",
    storage: "15GB",
    comment: "rancher-0" },
# rancherノード #2
  { name: "rancher-1", cpu: 2, memory: 4096,
    box: "ubuntu/bionic64",
    private_ip: "172.16.20.211",
    storage: "15GB",
    comment: "rancher-1" },
# rancherノード #3
  { name: "rancher-2", cpu: 2, memory: 4096,
    box: "ubuntu/bionic64",
    private_ip: "172.16.20.212",
    storage: "15GB",
    comment: "rancher-2" },
# LBノード #1
  { name: "lb-0", cpu: 1, memory: 1024,
    box: "ubuntu/bionic64",
    private_ip: "172.16.20.201",
    storage: "10GB",
    comment: "lb-0" },
]
Vagrant.configure("2") do |config|
  vm_spec.each do |spec|
    config.vm.define spec[:name] do |server|
      server.vm.box = spec[:box]
      server.disksize.size = spec[:storage]
      server.vm.box_url = spec[:box_url]
      server.vm.hostname = spec[:name]
      server.vm.network :private_network,ip: spec[:private_ip]
      server.vm.provider "virtualbox" do |vbox|
        vbox.gui = false
        vbox.cpus = spec[:cpu]
        vbox.memory = spec[:memory]
      end
    end
  end
end
Ubuntu vBoxデフォルトの10GBでは容量が足りなくなるので、disksizeを変更できるプラグインをインストールします。
Windows PowerShellをvagrantfileのあるフォルダで開いて、以下を実行します。
> vagrant plugin install vagrant-disksizeインストールが完了したら、先ほどのvagrantfileの内容で仮想マシンを起動します。そのまま以下のコマンドを実行しましょう!
> vagrant up環境にもよりますが、5~10分ほどでUbuntuが4台起動します。
2.OSの設定
rootユーザ宛てにsshで接続できるような設定を4台全てに行います。
まずは以下のコマンドで作業するVMに接続します。
>vagrant ssh rancher-0
Welcome to Ubuntu 18.04.4 LTS (GNU/Linux 4.15.0-88-generic x86_64)
~
vagrant@rancher-0:~$
rootユーザのパスワードを変更します。
vagrant@rancher-0:~$ sudo passwd
Enter new UNIX password: (パスワードを入力する)
Retype new UNIX password: (同じパスワードを入力する)
passwd: password updated successfully
vagrant@rancher-0:~$
rootユーザでパスワードによるsshを許可する設定を行います。
vagrant@rancher-0:~$ sudo vi /etc/ssh/sshd_config
## 以下を書き換えます
~
変更前
#PermitRootLogin prohibit-password
↓
PermitRootLogin yes
~
変更前
PasswordAuthentication no
↓
PasswordAuthentication yes
~
:wqで終了
sshdサービスを再起動します。
vagrant@rancher-0:~$ sudo systemctl restart sshd
vagrant@rancher-0:~$
これらの操作を他の3台にも行ってください。
これでOSの準備は完了です!
3. LBの構築
高可用性(HA)構成のRancherを構築するためには、1つのアドレスでリクエストを受けて3台のRancherに対してリクエストを割り振る、ロードバランサ(LB)が必要です。
ここではVM lb-0にnginxを使ってLBを構築します。
作業はTeraTermなどのターミナルソフトでlb-0にrootでssh接続を行います。
まずはnginxインストールに必要なパッケージをインストールします。
root@lb-0:~# apt-get install -y build-essential \
> libpcre3-dev \
> libssl-dev \
> zlib1g-dev
~
Setting up g++ (4:7.4.0-1ubuntu2.3) ...
update-alternatives: using /usr/bin/g++ to provide /usr/bin/c++ (c++) in auto mode
Setting up build-essential (12.4ubuntu1) ...
Processing triggers for man-db (2.8.3-2ubuntu0.1) ...
Processing triggers for libc-bin (2.27-3ubuntu1) ...
root@lb-0:~#
nginxをインストールします。
root@lb-0:~# wget http://nginx.org/download/nginx-1.14.2.tar.gz
~
nginx-1.14.2.tar.gz 100%[===================>] 991.59K   324KB/s    in 3.1s

2020-06-09 00:53:59 (324 KB/s) - ‘nginx-1.14.2.tar.gz’ saved [1015384/1015384]

root@lb-0:~# tar zxf nginx-1.14.2.tar.gz
root@lb-0:~# cd nginx-1.14.2/
root@lb-0:~/nginx-1.14.2# ./configure --with-stream \
> --with-stream_ssl_module
~
  nginx http fastcgi temporary files: "fastcgi_temp"
  nginx http uwsgi temporary files: "uwsgi_temp"
  nginx http scgi temporary files: "scgi_temp"

root@lb-0:~/nginx-1.14.2# make
~
        -e "s|%%ERROR_LOG_PATH%%|/usr/local/nginx/logs/error.log|" \
        < man/nginx.8 > objs/nginx.8
make[1]: Leaving directory '/root/nginx-1.14.2'
root@lb-0:~/nginx-1.14.2# make install
~
test -d '/usr/local/nginx/html' \
        || cp -R html '/usr/local/nginx'
test -d '/usr/local/nginx/logs' \
        || mkdir -p '/usr/local/nginx/logs'
make[1]: Leaving directory '/root/nginx-1.14.2'
root@lb-0:~/nginx-1.14.2#
これで/usr/local/nginxにnginxがインストールされました。
nginxの設定ファイルを書き換えます。
root@lb-0:~# vi /usr/local/nginx/conf/nginx.conf
## ファイルの内容 デフォルトの記載は消して、以下を書き込みます。
worker_processes 4;
worker_rlimit_nofile 40000;

events {
    worker_connections 8192;
}

stream {
    upstream rancher_servers_http {
        least_conn;
        server 172.16.20.210:80 max_fails=3 fail_timeout=5s;
        server 172.16.20.211:80 max_fails=3 fail_timeout=5s;
        server 172.16.20.212:80 max_fails=3 fail_timeout=5s;
    }
    server {
        listen 80;
        proxy_pass rancher_servers_http;
    }

    upstream rancher_servers_https {
        least_conn;
        server 172.16.20.210:443 max_fails=3 fail_timeout=5s;
        server 172.16.20.211:443 max_fails=3 fail_timeout=5s;
        server 172.16.20.212:443 max_fails=3 fail_timeout=5s;
    }
    server {
        listen     443;
        proxy_pass rancher_servers_https;
    }

}
nginxを起動します。
root@lb-0:~# /usr/local/nginx/sbin/nginx
root@lb-0:~#
これでLBの構築は完了です。
4. DNSの構築
RancherではリクエストしてきたURL(ホスト名)でアクセスを判別しているので、ドメイン名による名前解決が必要です。
また、FQDNはクラスタ内部でも通信に利用されるため、クラスタ内のcorednsからアクセス可能なDNSをlb-0に構築します。
まずはlb-0にrootでssh接続を行い、bind9をインストールします。
root@lb-0:~# apt-get install -y bind9
~
Processing triggers for man-db (2.8.3-2ubuntu0.1) ...
Processing triggers for ufw (0.36-0ubuntu0.18.04.1) ...
Processing triggers for ureadahead (0.100.0-21) ...
Processing triggers for libc-bin (2.27-3ubuntu1) ...
root@lb-0:~#
bind9の設定ファイルを編集します。
root@lb-0:~# vi /etc/bind9/named.conf.local
## ファイル内容
zone example.com. IN {
  type master;
  file example.com.zone";
};
ドメイン名は何でもいいですが、.localは予約されていて後でつまづくので、末尾は.comなどにしましょう。
bind9のoptions設定ファイルを編集します。
root@lb-0:~# vi /etc/bind/named.conf.options
## ファイル内容
options {
        directory "/var/cache/bind";
        listen-on port 53 { localhost; 172.16.20.0/24; 10.0.0.0/8; };
        allow-query { localhost; 172.16.20.0/24; 10.0.0.0/8; };
        forwarders { 8.8.8.8; };
        recursion yes;
};
続いてゾーンファイルを作成します。
root@lb-0:~# vi /var/cache/bind/example.com.zone
## ファイル内容
$TTL 86400

@ IN SOA lb.example.com root.example.com (
  2018050600
  3600
  900
  604800
  86400
)

      IN NS lb.example.com.
lb IN A  172.16.20.201
rancher-0 IN A  172.16.20.210
rancher-1 IN A  172.16.20.211
rancher-2 IN A  172.16.20.212
bind9サービスを再起動します。
root@lb-0:~# systemctl restart bind9
root@lb-0:~#
全てのVMのDNSサーバをlb-0に設定します。
4台すべてに以下の作業を行ってください。
root@rancher-0:~# vi /etc/resolv.conf
## 内容を以下に書き換える
nameserver 172.16.20.201
options edns0
search example.comこれでDNSの準備は完了です!
5.Dockerのインストール
当Webサイトの記事でも何回か紹介していますが、KubernetesはDockerなどのコンテナランタイムのコンテナ作成機能を利用してコンテナをオーケストレーションしています。
ここではK8sクラスタを構築するためにRancher用のVM3台にDockerをインストールします。
まずはDockerのインストールに必要なパッケージをインストールします。
root@rancher-0:~# apt-get install -y apt-transport-https \
> ca-certificates \
> curl software-properties-common gnupg2
~
Processing triggers for dbus (1.12.2-1ubuntu1.1) ...
Processing triggers for man-db (2.8.3-2ubuntu0.1) ...
Processing triggers for ca-certificates (20190110~18.04.1) ...
Updating certificates in /etc/ssl/certs...
0 added, 0 removed; done.
Running hooks in /etc/ca-certificates/update.d...
done.
root@rancher-0:~#
Dockerのリポジトリをインストールします。
root@rancher-0:~# curl -fsSL https://download.docker.com/linux/ubuntu/gpg | apt-key add -
OK
root@rancher-0:~# add-apt-repository \
>   "deb [arch=amd64] https://download.docker.com/linux/ubuntu \
>   $(lsb_release -cs) \
>   stable"
~
Get:6 http://archive.ubuntu.com/ubuntu bionic-backports InRelease [74.6 kB]
Fetched 329 kB in 3s (107 kB/s)
Reading package lists... Done
root@rancher-0:~#
Dockerをインストールします。
root@rancher-0:~# apt-get update && apt-get install -y \
>   containerd.io=1.2.13-1 \
>   docker-ce=5:19.03.8~3-0~ubuntu-$(lsb_release -cs) \
>   docker-ce-cli=5:19.03.8~3-0~ubuntu-$(lsb_release -cs)
~
Created symlink /etc/systemd/system/sockets.target.wants/docker.socket → /lib/systemd/system/docker.socket.
Processing triggers for libc-bin (2.27-3ubuntu1) ...
Processing triggers for systemd (237-3ubuntu10.39) ...
Processing triggers for man-db (2.8.3-2ubuntu0.1) ...
Processing triggers for ureadahead (0.100.0-21) ...
root@rancher-0:~#
一応動作確認しましょう。
oot@rancher-0:~# docker pull nginx
Using default tag: latest
latest: Pulling from library/nginx
afb6ec6fdc1c: Pull complete
dd3ac8106a0b: Pull complete
8de28bdda69b: Pull complete
a2c431ac2669: Pull complete
e070d03fd1b5: Pull complete
Digest: sha256:c870bf53de0357813af37b9500cb1c2ff9fb4c00120d5fe1d75c21591293c34d
Status: Downloaded newer image for nginx:latest
docker.io/library/nginx:latest
root@rancher-0:~#
これでDockerのインストールが完了です。
6. rkeでのK8sクラスタ構築
rkeというRancher Lab が提供している、K8sクラスタの構築支援ツールを利用して、K8sクラスタを構築します。
まずは構築用のVMにrke本体を導入します。
今回はlb-0を構築用に利用しようと思います。
root@lb-0:~# wget https://github.com/rancher/rke/releases/download/v1.0.8/rke_linux-amd64
~
Saving to: ‘rke_linux-amd64’

rke_linux-amd64     100%[===================>]  45.13M  4.41MB/s    in 11s

2020-06-09 02:58:39 (4.00 MB/s) - ‘rke_linux-amd64’ saved [47325245/47325245]
root@lb-0:~# mv rke_linux-amd64 /usr/local/bin/rke
root@lb-0:~# chmod +x /usr/local/bin/rke
root@lb-0:~#
rkeでは、構築用VMからssh接続を行ってK8sクラスタを自動で構築します。
root同士のsshがパスワード無しで行えるようにssh鍵の設定を行います。
root@lb-0:~# ssh-keygen
Generating public/private rsa key pair.
Enter file in which to save the key (/root/.ssh/id_rsa):
Enter passphrase (empty for no passphrase):
Enter same passphrase again:
Your identification has been saved in /root/.ssh/id_rsa.
Your public key has been saved in /root/.ssh/id_rsa.pub.
The key fingerprint is:
SHA256:2ND8Kbv3Zqs/s1KUlx/WCZRSSZny0z1eORY+CVYOwBE root@lb-0
The key's randomart image is:
+---[RSA 2048]----+
|          .EB=*. |
|       o   + Oo. |
|      . o   =.=oB|
|       + . .ooo&+|
|      . S o. .=.*|
|         o  .  ..|
|        .  .     |
|         .o =    |
|        ...B==   |
+----[SHA256]-----+
root@lb-0:~#
RancherVM3台にssh公開鍵を配布します。
root@lb-0:~# ssh-copy-id rancher-0
~
Now try logging into the machine, with:   "ssh 'rancher-0'"
and check to make sure that only the key(s) you wanted were added.

root@lb-0:~#
これでRancherVMにパスワード無しでssh接続できるようになりました。
lb-0上に作成するK8sクラスタの構成を定義するファイルを作成します。
root@lb-0:~# vi rancher-cluster.yml
## ファイル内容
nodes:
  - address: 172.16.20.210
    user: root
    role: [controlplane, worker, etcd]
    internal_address: 172.16.20.210
  - address: 172.16.20.211
    user: root
    role: [controlplane, worker, etcd]
    internal_address: 172.16.20.211
  - address: 172.16.20.212
    user: root
    role: [controlplane, worker, etcd]
    internal_address: 172.16.20.212

services:
  etcd:
    snapshot: true
    creation: 6h
    retention: 24h

network:
  plugin: canal
  options:
    canal_iface: enp0s8

dns:
  provider: coredns
  upstreamnameservers:
  - 172.16.20.201

# Required for external TLS termination with
# ingress-nginx v0.22+
ingress:
  provider: nginx
  options:
    use-forwarded-headers: "true"
[network:]セクションでは、クラスタ内部の通信で利用するNICを指定しています。
これを指定しないと、NATNICで通信しようとするため、クラスタがうまく機能しません。
[dns:]セクションでは、K8sクラスタ内部のcorednsが名前解決するためのdnsとしてlb-0を指定しています。
これによって、podからもlb-0に設定したゾーンの名前解決ができるようになります。
それでは実際に構築してみましょう!
root@lb-0:~# rke up --config rancher-cluster.yml
~
INFO[0365] [addons] Executing deploy job rke-metrics-addon
INFO[0375] [addons] Metrics Server deployed successfully
INFO[0375] [ingress] Setting up nginx ingress controller
INFO[0375] [addons] Saving ConfigMap for addon rke-ingress-controller to Kubernetes
INFO[0375] [addons] Successfully saved ConfigMap for addon rke-ingress-controller to Kubernetes
INFO[0375] [addons] Executing deploy job rke-ingress-controller
INFO[0386] [ingress] ingress controller nginx deployed successfully
INFO[0386] [addons] Setting up user addons
INFO[0386] [addons] no user addons defined
INFO[0386] Finished building Kubernetes cluster successfully
root@lb-0:~#
構築が完了すると、カレントディレクトリにkube_config_rancher-cluster.ymlというファイルができます。
これがK8sクラスタにアクセスするためのkubeconfigファイルなので、ホームディレクトリの.kubeの下にconfigという名前で保存することで、kubectlでアクセスできるようになります。
root@lb-0:~# mkdir ~/.kube
root@lb-0:~# cp kube_config_rancher-cluster.yml ~/.kube/config
root@lb-0:~#
lb-0にkubectlをインストールします。
root@lb-0:~# mkdir ~/.kube
root@lb-0:~# cp kube_config_rancher-cluster.yml ~/.kube/config
root@lb-0:~# curl -s https://packages.cloud.google.com/apt/doc/apt-key.gpg | sudo apt-key add -
OK
root@lb-0:~# cat <<EOF | sudo tee /etc/apt/sources.list.d/kubernetes.list
> deb https://apt.kubernetes.io/ kubernetes-xenial main
> EOF
deb https://apt.kubernetes.io/ kubernetes-xenial main
root@lb-0:~# apt-get update
~
Reading package lists... Done
root@lb-0:~# apt-get install -y kubectl
~
Selecting previously unselected package kubectl.
(Reading database ... 65638 files and directories currently installed.)
Preparing to unpack .../kubectl_1.18.3-00_amd64.deb ...
Unpacking kubectl (1.18.3-00) ...
Setting up kubectl (1.18.3-00) ...
root@lb-0:~# kubectl get nodes
NAME            STATUS   ROLES                      AGE   VERSION
172.16.20.210   Ready    controlplane,etcd,worker   41m   v1.17.5
172.16.20.211   Ready    controlplane,etcd,worker   41m   v1.17.5
172.16.20.212   Ready    controlplane,etcd,worker   41m   v1.17.5
root@lb-0:~#
これで、K8sクラスタが正常に動作していることが確認できました。
7. Helmのインストール
Rancher自体をHelmでインストールするので、まずはHelmを導入します。
kubectlと同様に、lb-0に導入して、K8sクラスタを操作します。
root@lb-0:~# wget https://get.helm.sh/helm-v3.2.3-linux-amd64.tar.gz
~
helm-v3.2.3-linux-amd64.tar.gz       100%[=====================================================================>]  12.33M  1.77MB/s    in 6.4s

2020-06-09 04:18:10 (1.93 MB/s) - ‘helm-v3.2.3-linux-amd64.tar.gz’ saved [12924654/12924654]

root@lb-0:~# tar zxf helm-v3.2.3-linux-amd64.tar.gz
root@lb-0:~# mv linux-amd64/helm /usr/local/bin/
root@lb-0:~# helm version
version.BuildInfo{Version:"v3.2.3", GitCommit:"8f832046e258e2cb800894579b1b3b50c2d83492", GitTreeState:"clean", GoVersion:"go1.13.12"}
root@lb-0:~#
これでHelmのインストールは完了です。
8. Rancherのインストール
さあ、お待たせいたしました。
やっとRancherのインストールです。
Rancherにはhttpsでアクセスを行わなければならないので、証明書を設定する必要があります。
ここではRancherデフォルトの自己証明書を利用します。
そのためにcert-managerをインストールします。
まずはCRDを作成します。
root@lb-0:~/linux-amd64# kubectl apply --validate=false -f https://github.com/jetstack/cert-manager/releases/download/v0.15.0/cert-manager.crds.yaml
customresourcedefinition.apiextensions.k8s.io/certificaterequests.cert-manager.io created
customresourcedefinition.apiextensions.k8s.io/certificates.cert-manager.io created
customresourcedefinition.apiextensions.k8s.io/challenges.acme.cert-manager.io created
customresourcedefinition.apiextensions.k8s.io/clusterissuers.cert-manager.io created
customresourcedefinition.apiextensions.k8s.io/issuers.cert-manager.io created
customresourcedefinition.apiextensions.k8s.io/orders.acme.cert-manager.io created
root@lb-0:~/linux-amd64#
cert-managerのnamespaceを作成します。
root@lb-0:~/linux-amd64# kubectl create namespace cert-manager
namespace/cert-manager created
root@lb-0:~/linux-amd64#
helmリポジトリを導入します。
root@lb-0:~/linux-amd64# helm repo add jetstack https://charts.jetstack.io
"jetstack" has been added to your repositories
root@lb-0:~/linux-amd64# helm repo update
Hang tight while we grab the latest from your chart repositories...
...Successfully got an update from the "jetstack" chart repository
Update Complete. ? Happy Helming!?
root@lb-0:~/linux-amd64#
cert-managerをインストールします。
root@lb-0:~/linux-amd64# helm install \
>   cert-manager jetstack/cert-manager \
>   --namespace cert-manager \
>   --version v0.15.0
~
documentation:

https://cert-manager.io/docs/usage/ingress/
root@lb-0:~/linux-amd64#
これで証明書発行の準備ができました。
それではRancherをインストールしましょう!
まずはRancher用のHelmリポジトリをインストールします。
root@lb-0:~# helm repo add rancher-stable https://releases.rancher.com/server-charts/stable
"rancher-stable" has been added to your repositories
root@lb-0:~#
Rancher用のnamespaceを作成します。
root@lb-0:~# kubectl create namespace cattle-system
namespace/cattle-system created
root@lb-0:~#
Rancherをインストールします。
root@lb-0:~# helm install rancher rancher-stable/rancher \
>   --namespace cattle-system \
>   --set hostname=lb.example.com
~
Browse to https://lb.example.com

Happy Containering!
root@lb-0:~#
インストールが完了したように見えますが、裏ではポッドが作成されたり、いろいろ動いています。
最後にrancherのロールアウトが行われるので、ロールアウトの状況を確認します。
root@lb-0:~# kubectl -n cattle-system rollout status deploy/rancher
Waiting for deployment "rancher" rollout to finish: 0 of 3 updated replicas are available...
Waiting for deployment "rancher" rollout to finish: 1 of 3 updated replicas are available...
Waiting for deployment spec update to be observed...
Waiting for deployment "rancher" rollout to finish: 1 of 3 updated replicas are available...
Waiting for deployment "rancher" rollout to finish: 2 of 3 updated replicas are available...
deployment "rancher" successfully rolled out
root@lb-0:~#
これでRancherのインストールは完了です。
念のためRancherのポッドが起動していることを確認します。
root@lb-0:~# kubectl -n cattle-system get deploy rancher
NAME      READY   UP-TO-DATE   AVAILABLE   AGE
rancher   3/3     3            3           7m38s
root@lb-0:~#
ブラウザからRancherにアクセスしてみます。
PCのDNSを一時的にlb-0にするか、hostsに書き込んで、[lb.example.com]で172.16.20.201にアクセスできるようにしてください。
## Windowsのhostsの場合
172.16.20.201 lb.example.com
ブラウザから[lb.example.com]にアクセスします。
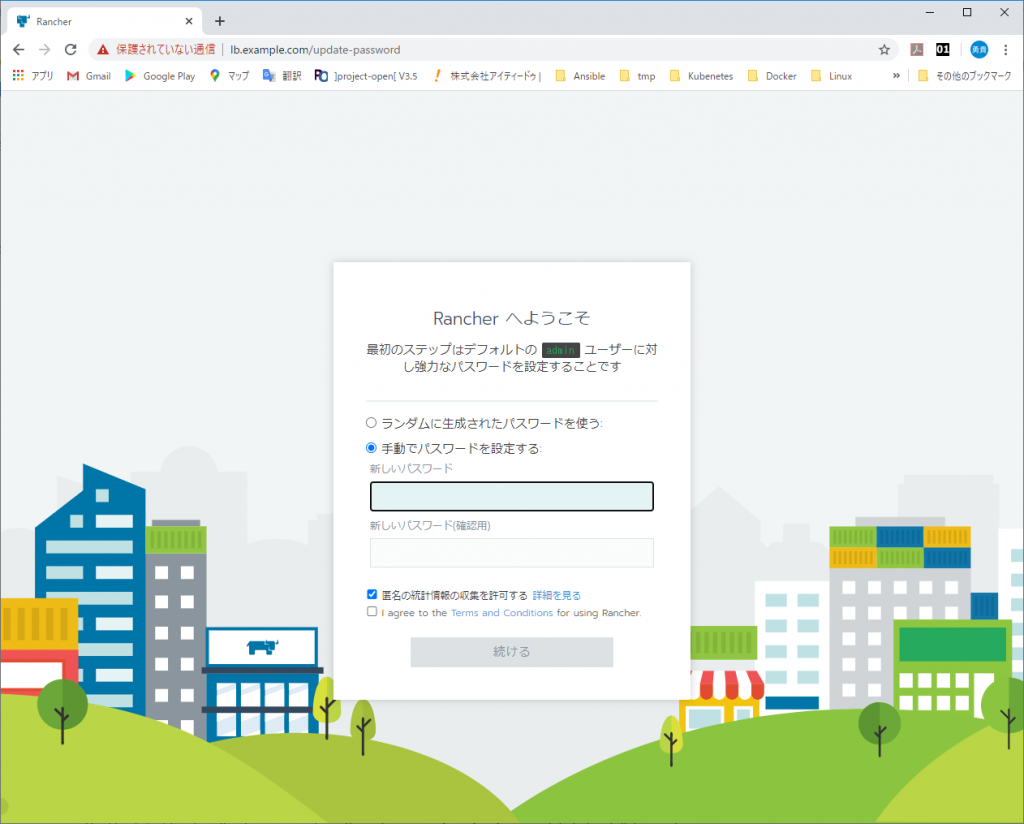
Rancherの初期画面が表示されました!
おめでとうございます!
あとはパスワードを設定して触ってみてください。
おわりに
今回は、クラウド上に構築すると非常にコストがかかる高可用性構成のRancherを、VirtualBoxに無理やりインストールしてみました。
Windowsでの手順ですが、PowerShellをTerminalに読み替えることでMacやLinuxでも構築できると思います。
構築するPCにそれなりにスペックが必要ですが、料金を気にせずに検証するには非常に有用な環境ではないかと思います。
また、ここからのRancherの操作概要については以下のQiita記事にて公開していますので、よろしければそちらもご覧くださいませ。
・Rancherって何ができるの?